Learn how to add a patterned background to printable design. Includes a video tutorial, step-by-step directions, and a downloadable template.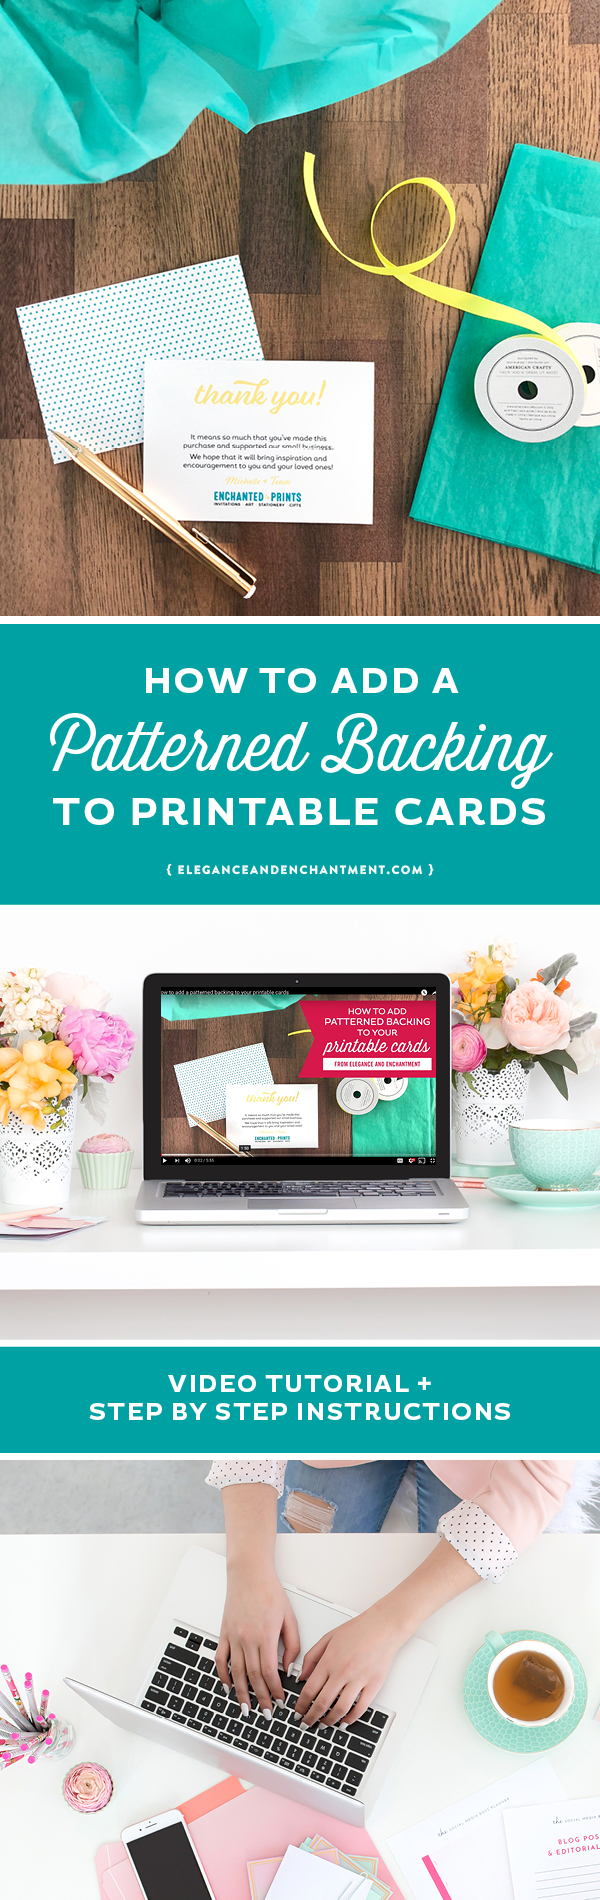
If you’ve ever downloaded a printable, or designed your own, figuring out how to add a design to the back, and print double-sided can feel like a bit of a puzzle.
How to add a patterned background to printable cards
In this tutorial, you’ll learn how to:
– change the color of a pattern in Adobe Illustrator
– create a full-page backing design
– create an easy-to-print document in Adobe InDesign
– print your design front to back
– trim out your final design
Prefer to read your instructions? Scroll on past the video!
MATERIALS NEEDED
– Adobe Illustrator | download a free trial
– Adobe InDesign | download a free trial
– a printer
– card stock
– scissors or a ruler, cutting mat, and craft knife
– if you run into printing troubles, this article will help

THE BACKSTORY
I just redesigned the logo for my shop, Enchanted Prints, and thought this would be the perfect opportunity to create a new thank you note to include with shipments to my customers.
Flat thank you cards are nice, but we small business owners like to add little extras, and I thought that a patterned backing to these cards would be a nice touch.
If you’ve been wondering how to add a patterned background to printable, here are your step-by-step instructions.
GETTING STARTED
I began by designing a 5” x 3.5” flat card using Adobe InDesign. You can download a free template of this card using the signup form at the bottom of the post.
DESIGNCUTS TO THE RESCUE
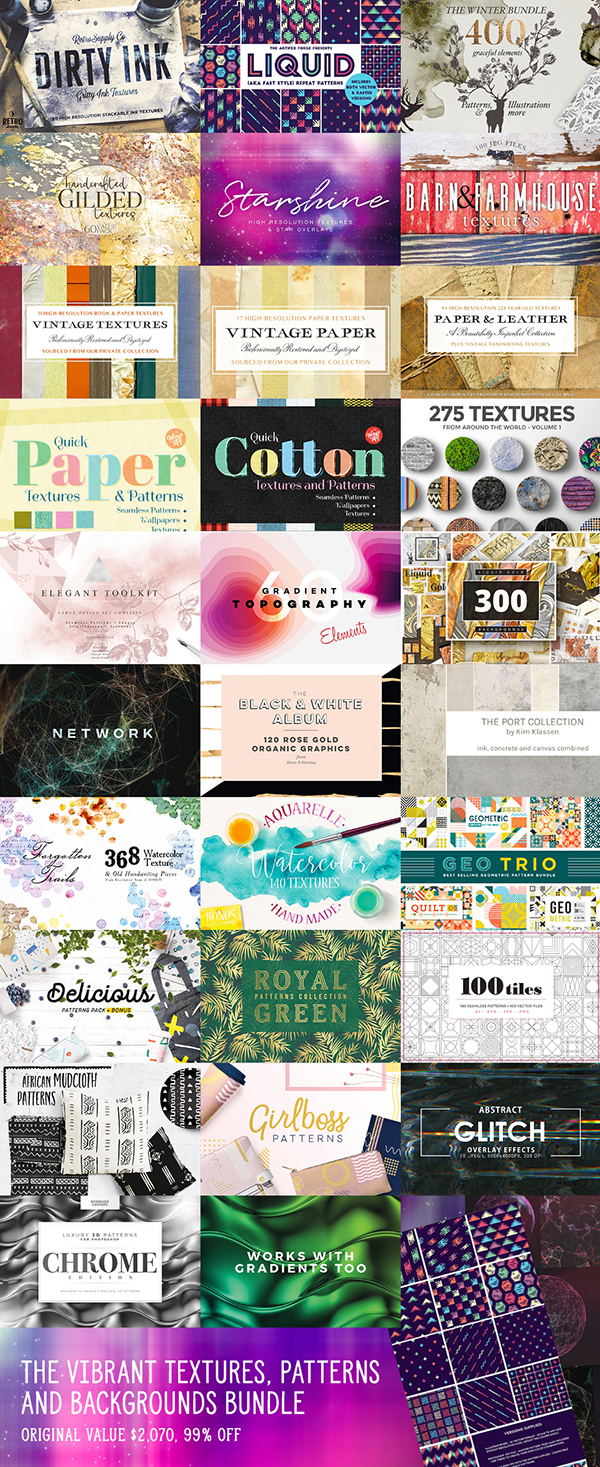
I don’t know how to create my own patterns without consulting a tutorial, so I saved time by downloading a pre-made background from DesignCuts.
Lucky for me, DesignCuts just happened to be selling a bundle of patterned resources, which also included backgrounds and textures that I can use for future projects. Best of all, the entire bundle of all of these goodies was only t$29 USD, which is so much better than the $2070 USD that it would cost if I had purchased the items separately. Win!
If you happen to catch this blog post after the Patterns + Backgrounds bundle has expired, rest assured that DesignCuts has another equally awesome bundle available on their site.
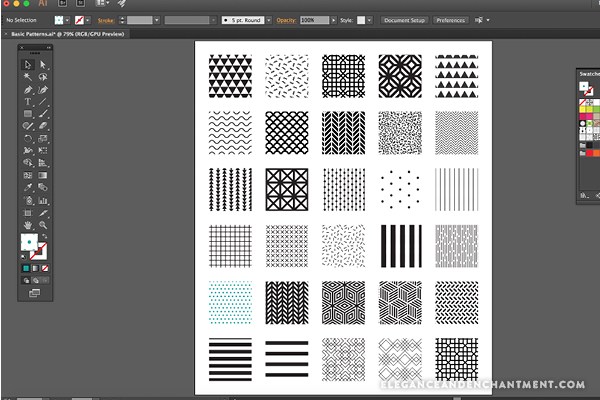
EDITING MY PATTERN IN ILLUSTRATOR
Step 1
Once I chose the perfect resource from the Patterns + Backgrounds bundle, called Geo Trio (fun, right?), I opened the .ai file in Illustrator.
If you are more of a Photoshop or Canva person, know that JPG and PNGs come in the Geo Trio download as well.
Step 2
After deciding that the polka dot pattern would be the perfect choice as the backing for my cards (because, classic), I copy + pasted my logo from the 5” x 3.5” card in InDesign, directly into the patterned Illustrator file.
Once it was there, I used the eyedropper tool to extract my signature teal color, and add it to my swatches palette.
Step 3
Next, I double-clicked on the polka dot pattern swatch, to open it in editing mode. Using my selection tool, I clicked on the polka dots, and then clicked on the teal color in my swatch palette, to change the color from black.
 Bonus tip for selling your printables on Etsy
If you’re wondering what types of printable designs sell best, you’ll definitely want to check out my friends Julie and Cody’s free eBook, Seasonal Products Secret. Click here to download it for free.
CREATING AN 8.5 x 11 BACKGROUND
Step 1
Once the color change was in place, I opened a new Adobe Illustrator document, sized at 8.5” x 11”.
Step 2
I returned to the pattern document, selected my new, teal polka dots, then copy, and pasted it into the 8.5” x 11” document.
Step 3
I dragged the corners of the box edge to edge until it filled the entire page and then saved the document.
PUTTING IT ALL TOGETHER
Step 1
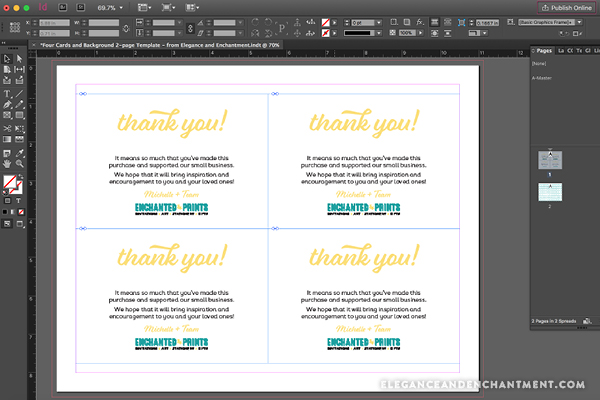
Back over in InDesign, I create a high res PDF of my 5” x 3.5” flat thank you card. Next, I create an 8.5” x 11” document in InDesign with two pages.
Step 2
I draw out a 5” x 3.5” content-box (rectangle with the “x” going through it), and then use File>Place to place my flat thank you card design inside. I add a .15 black border to the box, so I have a cutting guide.
Step 3
I duplicate the box, so there are now four copies of the thank you card on one page. This known as 4up in the printing/production industry, if you want to sound smart. On the second page, I place the 8.5” x 11” pattern.
Step 4
Adding the patterned page to the InDesign document is not a necessary step, but I like to keep everything that gets printed together to streamline the printing process.
You can download a free template of this 2-page InDesign setup using the signup form at the bottom of the post.
PRINTING AND ASSEMBLY
Step 1
I start by printing page 1 of the InDesign document (four thank you cards). Once that comes out of the printer, I flip the page over and put it back in the printer before printing page 2.
This step may take a little bit of experimentation on your end. For example, your printer’s paper feed might require you to insert page 1 back in face-up instead of face-down. If you run into problems, this post on printing your printables will be helpful!
Step 2
Once the page has been printed on both sides, all that’s left to do is trim them out. I like to use a cutting mat, ruler, and craft knife for this, but scissors will do the trick!
Your cards are officially ready for you to include in shipments to your customers!
Now that you know how to add a patterned background to printable, you’ve added instant professionalism to your designs.
Bonus tip for selling your printables on Etsy
If you’re wondering what types of printable designs sell best, you’ll want to check out my friends Julie and Cody’s free eBook, Seasonal Products Secret. Click here to download it for free.

This post contains affiliate links. If you make a purchase, I make a small commission at no extra expense to you. Thank you for supporting my business!