This post on how to repurpose your stock photos has been sponsored by BeFunky and compensation was received for my time in developing the post. All thoughts, ideas & opinions are my own.
As small business owners, we have so much on our plates, and we’ve got to be efficient with our time. This means keeping it simple and finding smart solutions. When I first started my business it felt like I had to do everything from scratch and it took F-O-R-E-V-E-R. No wonder it took me so many years to start generating income!
Now, things are different. We have tons of resources at our disposal to create great designs and to present them in a professional way, including one of my favorite sites, BeFunky. I have been a fangirl for years, and each time I log onto their platform I’m blown away by how much they offer.
Here are some of the other posts where you can see how I created projects using BeFunky tools:
Creating Inspirational Art Using BeFunky
How to Create Professional Graphics for your Online Shop
How to Design Printable Artwork without Professional Software (Shared on my other site, Michelle Hickey Design)
One of the newest features to BeFunky is their Cutout Tool and Magic Brush. Once I checked it out, I knew that it needed an entire post to show off all of the bells and whistles.
What are the Cutout Tool and Magic Brush?
The Cutout Tool makes it possible for you to easily remove background images from photos or to isolate an object from a photo, so that you can place it in a different photo. There are several different brushes to work with but the coolest, as you might expect by its name, is the Magic Brush.
This special tool is super intuitive, with the ability to erase areas of like colors that you paint over, leaving non-similar colors alone. That way you can easily erase even the most complicated of backgrounds or object shapes.
Here’s a video of Magic Brush in action:
The Magic Brush Cutout Tool from BeFunky on Vimeo.
What kinds of projects could you use the Cutout Tool and Magic Brush for?
When I saw this tool, I immediately thought — this is how to repurpose your stock photos! Earlier in this post, I referred to “the old days” when I used to have to do everything from scratch. This included shooting all of my own photos (despite the fact that I’m not a photographer).
While I think that using stock images to display our work are a huge timesaver, there’s even more that we can use them for.
Here’s an example of how I used these new tools to take an existing image and multiply it.
Isolating the objects
I started with an existing photo that took. I sell this calendar and stand in my Etsy shop, and used to create these elaborate photoshoots for each month of the year. #headache

Using the Cutout Tool and Magic Brush I was able to isolate the stand and calendar card from the background so that I could place them on some alternate stock image backgrounds (goodbye, 3-hour photoshoots).
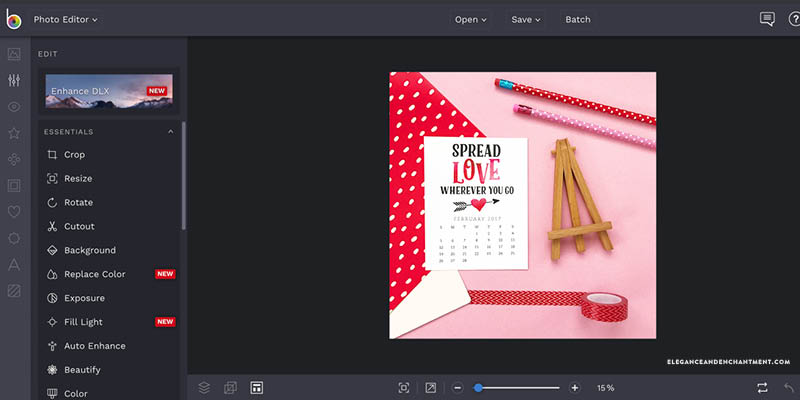
In this example, I worked inside of BeFunky’s Photo Editor, but you can also use it when working with image layers in the Graphic Designer and Collage Maker.

A few tips for working with these tools:
- Be patient. The first time I tried it, I got a little frustrated with the jagged edges. You can use the zoom feature to get a little closer and refine any edge that doesn’t look clean.
- Play around with brush sizes and tolerance. Each photo will be different and will require a little tweaking.
- Use the hide/show mask feature, which helps you better see what you’re removing and what you’re keeping (located in the upper left hand corner of the Cutout Tool Panel).
- Use the “undo” tool if you make a mistake (located in the bottom right-hand corner). Don’t be afraid to make mistakes!
Placing the objects in new photos
Once I had my calendar card and stand isolated and cut out of my original photo, I saved it as a PNG (transparent background) to my computer. Please note, you cannot save PNGs to BeFunky, only to your computer.
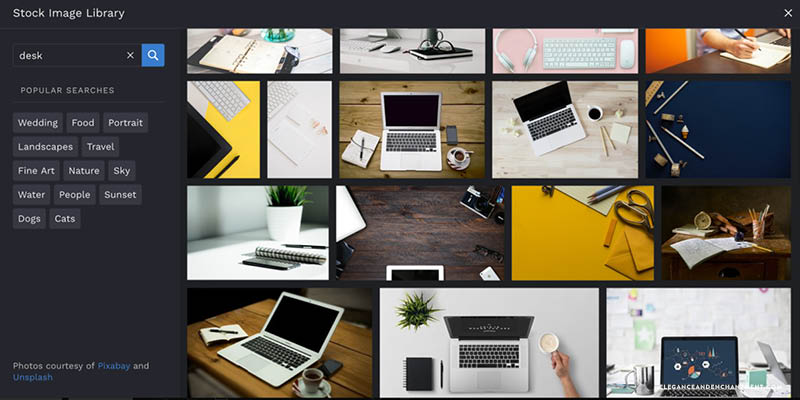
Next, I opened a new image in the BeFunky Editor. You can access free stock images from right inside the platform which is amazing, so I went ahead and searched for desktop flatlays. I’m all about yellow lately so I selected this one first.
Now it’s time to combine the two images together! I navigated to the image manager in the Photo Editor and uploaded the PNG file of my calendar card and stand. Next, I clicked on it and selected “add layer”. From there I was able to resize and move the image around.
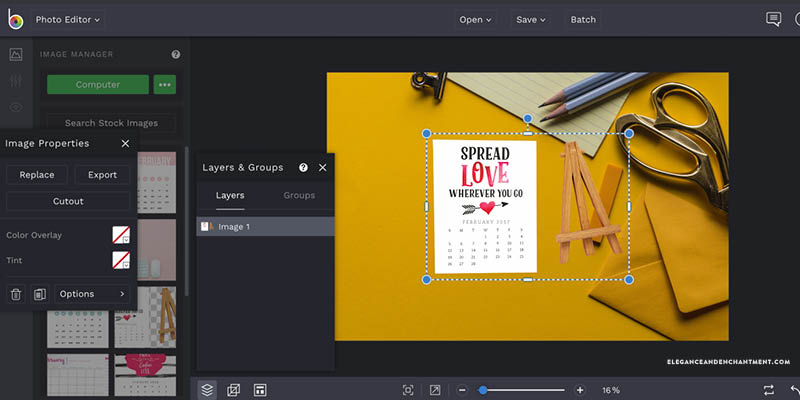
You may notice that the calendar says February 2017. That needs to be updated! I navigate back to the image manager and upload a new calendar card JPG, and repeated the step of adding as a layer, and then repositioning it so that covers the old card. Easy!

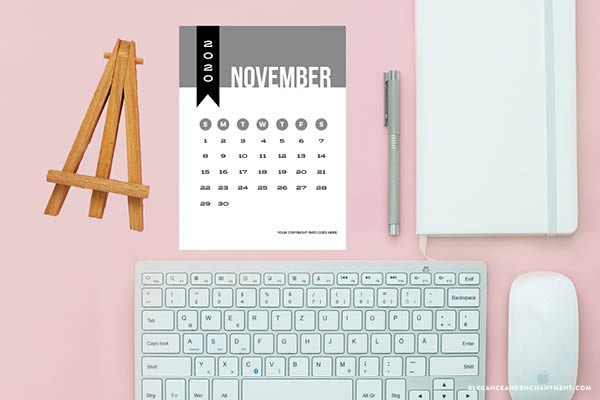
How to repurpose stock photos with BeFunky
Just for fun, I spotted another stock image that I thought would work well and I created an alternate version for November 2020. So much easier than setting up a photoshoot! How to repurpose your stock photos: done. ✅
What else can you create with BeFunky?
If you haven’t had the chance to play around with BeFunky of this tool yet, what are you waiting for? The Cutout Tool and Magic Brush are part of BeFunky Plus, an upgraded paid option, but there is so much that you can do, just on the free version.
The cost for BeFunky Plus is $6.99/month or $59.88/year and includes three different creative platforms: The Photo Editor (featured in this post) along with the Collage Maker and a Graphic Designer. The cost is incredibly affordable considering all that it offers and is the perfect solution for a new creative business owner.
I hope that this post has inspired new ways for you to you repurpose stock photos. Now it’s time to create something new to share with the world. Have fun!
 Do you sell Printable Designs on Etsy?
If you’re wondering what types of printables sell best, you’ll definitely want to check out my friends Julie and Cody’s free eBook, Seasonal Products Secret. Click here to download it for free.
This post contains affiliate links. If you make a purchase, I make a small commission at no extra expense to you. Thank you for supporting my business!